前后端项目优化
后端项目优化
通用返回对象
目的:给对象补充一些信息,告诉前端这个请求在业务层面上是成功还是失败
// 成功
{
  "code": 0, // 业务状态码
  "data": {
    "name": "yupi",
  },
  "message": "ok"
}

// 错误
{
  "code": 50001, // 业务状态码
  "data": null,
  "message": "用户操作异常"
}新建 src/main/java/com/mlinyun/usercenter/common/BaseResponse.java 文件,写入以下代码:
package com.mlinyun.usercenter.common;

import lombok.Data;

import java.io.Serializable;

/**
 * 通用返回类
 *
 * @param <T>
 */
@Data
public class BaseResponse<T> implements Serializable {

    /**
     * 状态码
     */
    private int code;

    /**
     * 数据
     */
    private T data;

    /**
     * 消息
     */
    private String message;

    /**
     * 描述
     */
    private String description;

    public BaseResponse(int code, T data, String message, String description) {
        this.code = code;
        this.data = data;
        this.message = message;
        this.description = description;
    }

    public BaseResponse(int code, T data, String message) {
        this(code, data, message, "");
    }

    public BaseResponse(int code, T data) {
        this(code, data, "", "");
    }

    public BaseResponse(ErrorCode errorCode) {
        this(errorCode.getCode(), null, errorCode.getMessage(), errorCode.getDescription());
    }

}新键 src/main/java/com/mlinyun/usercenter/common/ErrorCode.java 文件,写入以下代码:
package com.mlinyun.usercenter.common;

/**
 * 错误码
 */
public enum ErrorCode {

    SUCCESS(0, "Ok", ""),
    PARAMS_ERROR(40000, "请求参数错误", ""),
    PARAMS_NULL(40001, "请求参数数据为空", ""),
    NOT_LOGIN(40100, "用户未登录", ""),
    NO_AUTH(40101, "用户无权限", ""),
    SYSTEM_ERROR(50000, "系统内部异常", "");

    /**
     * 状态码
     */
    private final int code;

    /**
     * 状态码信息
     */
    private final String message;


    /**
     * 状态码描述(详情)
     */
    private final String description;

    ErrorCode(int code, String message, String description) {
        this.code = code;
        this.message = message;
        this.description = description;
    }

    public int getCode() {
        return code;
    }

    public String getMessage() {
        return message;
    }

    public String getDescription() {
        return description;
    }
}新建 src/main/java/com/mlinyun/usercenter/common/ResultUtils.java 文件,写入以下代码:
package com.mlinyun.usercenter.common;

/**
 * 返回工具类
 */
public class ResultUtils {

    /**
     * 业务执行成功
     *
     * @param data 返回的数据
     * @param <T>  泛型
     * @return 通用返回类-Ok
     */
    public static <T> BaseResponse<T> success(T data, String description) {
        return new BaseResponse<>(0, data, "Ok", description);
    }

    /**
     * 业务执行失败
     *
     * @param errorCode 错误码
     * @return 通用返回类-Fail
     */
    public static BaseResponse error(ErrorCode errorCode) {
        return new BaseResponse<>(errorCode);
    }

    /**
     * 业务执行失败
     *
     * @param code
     * @param message
     * @param description
     * @return
     */
    public static BaseResponse error(int code, String message, String description) {
        return new BaseResponse(code, null, message, description);
    }

    /**
     * 业务执行失败
     *
     * @param errorCode
     * @param message
     * @param description
     * @return
     */
    public static BaseResponse error(ErrorCode errorCode, String message, String description) {
        return new BaseResponse(errorCode.getCode(), null, message, description);
    }

    /**
     * 业务执行失败
     *
     * @param errorCode
     * @param description
     * @return
     */
    public static BaseResponse error(ErrorCode errorCode, String description) {
        return new BaseResponse(errorCode.getCode(), errorCode.getMessage(), description);
    }
}封装全局异常处理
新建 src/main/java/com/mlinyun/usercenter/exception/BusinessException.java 文件,写入下面的代码:
package com.mlinyun.usercenter.exception;

import com.mlinyun.usercenter.common.ErrorCode;

/**
 * 自定义业务异常类
 */
public class BusinessException extends RuntimeException {

    /**
     * 异常码
     */
    private final int code;

    /**
     * 异常描述
     */
    private final String description;

    public BusinessException(String message, int code, String description) {
        super(message);
        this.code = code;
        this.description = description;
    }

    public BusinessException(ErrorCode errorCode) {
        super(errorCode.getMessage());
        this.code = errorCode.getCode();
        this.description = errorCode.getDescription();
    }

    public BusinessException(ErrorCode errorCode, String description) {
        super(errorCode.getMessage());
        this.code = errorCode.getCode();
        this.description = description;
    }

    public int getCode() {
        return code;
    }

    public String getDescription() {
        return description;
    }
}新建 src/main/java/com/mlinyun/usercenter/exception/GlobalExceptionHandler.java 文件,写入以下代码:
package com.mlinyun.usercenter.exception;

import com.mlinyun.usercenter.common.BaseResponse;
import com.mlinyun.usercenter.common.ErrorCode;
import com.mlinyun.usercenter.common.ResultUtils;
import lombok.extern.slf4j.Slf4j;
import org.springframework.web.bind.annotation.ExceptionHandler;
import org.springframework.web.bind.annotation.RestControllerAdvice;

/**
 * 全局异常处理类
 */
@RestControllerAdvice
@Slf4j
public class GlobalExceptionHandler {

    /**
     * 业务异常
     *
     * @param e
     * @return
     */
    @ExceptionHandler(BusinessException.class)
    public BaseResponse<?> businessException(BusinessException e) {
        log.error("businessException: " + e.getMessage());
        return ResultUtils.error(e.getCode(), e.getMessage(), e.getDescription());
    }

    /**
     * 运行时异常
     *
     * @param e
     * @return
     */
    @ExceptionHandler(RuntimeException.class)
    public BaseResponse<?> runtimeException(RuntimeException e) {
        log.error("runtimeException: ", e);
        return ResultUtils.error(ErrorCode.SYSTEM_ERROR, e.getMessage(), "");
    }
}上面的笔记我没写解释(主要是快过年了,有些懒,只给出了最终的代码),如果想要学更多的话,建议观看鱼皮用户中心末的视频。
修改之前的代码
我们在之前写的代码中,很多都是直接返回信息,没有做通用的返回处理,还有如果出现参数为空我们直接返回 -1 或者 null,没有抛出异常。接下来我们就来修改这两个问题:
其他代码也需要根据实际情况进行修改,因为代码很长,这里就不展示了。
集成 Swagger3 和 knife4j,并生成 API 接口文档
添加依赖
向 pom.xml 文件中添加如下依赖:
<!-- Knife4j -->
<dependency>
    <groupId>com.github.xiaoymin</groupId>
    <artifactId>knife4j-openapi3-jakarta-spring-boot-starter</artifactId>
    <version>4.4.0</version>
</dependency>添加配置
打开 application.properties 文件,添加以下配置项:
# Swagger UI 配置项
# 自定义 Swagger UI 的 URL 地址
springdoc.swagger-ui.path=/user-center-api.html
# 设置 Swagger UI 中的标签按字母顺序排序
springdoc.swagger-ui.tags-sorter=alpha
# 设置 Swagger UI 中的接口按字母顺序排序
springdoc.swagger-ui.operations-sorter=alpha
# 指定生成的 OpenAPI 规范(JSON 格式)的访问路径为
springdoc.api-docs.path=/v3/api-docs


# knife4j 配置项
# 开启Knife4j增强模式
knife4j.enable=true
# 设置 Knife4j 的语言为简体中文
knife4j.setting.language=zh_cn
# 开启 BasicHttp 校验,保护文档
knife4j.basic.enable=true
# basic用户名
knife4j.basic.username=TestApi
# basic密码
knife4j.basic.password=123456
# 开启生产环境屏蔽 true:生产环境 false:非生产环境
knife4j.production=false添加配置类
在 com.mlinyun.usercenter 包下创建 config 包,然后再 config 包中创建 SwaggerConfiguration 文件,并写入如下代码:
package com.mlinyun.usercenter.config;
import io.swagger.v3.oas.models.ExternalDocumentation;
import io.swagger.v3.oas.models.OpenAPI;
import io.swagger.v3.oas.models.info.Contact;
import io.swagger.v3.oas.models.info.Info;
import io.swagger.v3.oas.models.info.License;
import org.springdoc.core.models.GroupedOpenApi;
import org.springframework.context.annotation.Bean;
import org.springframework.context.annotation.Configuration;
@Configuration
public class SwaggerConfiguration {
// 扫描路径
private static final String basePackage = "com.mlinyun.usercenter.controller";
@Bean
public GroupedOpenApi group01() {
return GroupedOpenApi.builder()
.group("凌云用户中心接口")
.packagesToScan(basePackage)
.build();
}
@Bean
public OpenAPI customOpenAPI() {
return new OpenAPI()
.info(apiInfo())
.externalDocs(externalDocumentation());
}
/**
* 创建该 API 的基本信息(这些基本信息会展现在文档页面中)
*/
private Info apiInfo() {
Contact contact = new Contact();
contact.setEmail("1938985998@qq.com");
contact.setName("mlinyun");
contact.setUrl("https://github.com/mlinyun");
return new Info()
.title("凌云用户中心系统API文档")
.description("企业核心的用户中心系统,基于 Spring Boot 后端 + React 前端的 **全栈项目**,实现了用户注册、登录、查询等基础功能。")
.version("v1.0.0")
.contact(contact)
.license(new License().name("Apache 2.0").url("https://github.com/mlinyun"));
}
private ExternalDocumentation externalDocumentation() {
return new ExternalDocumentation()
.description("项目 GitHub 地址")
.url("https://github.com/mlinyun/user-center");
}
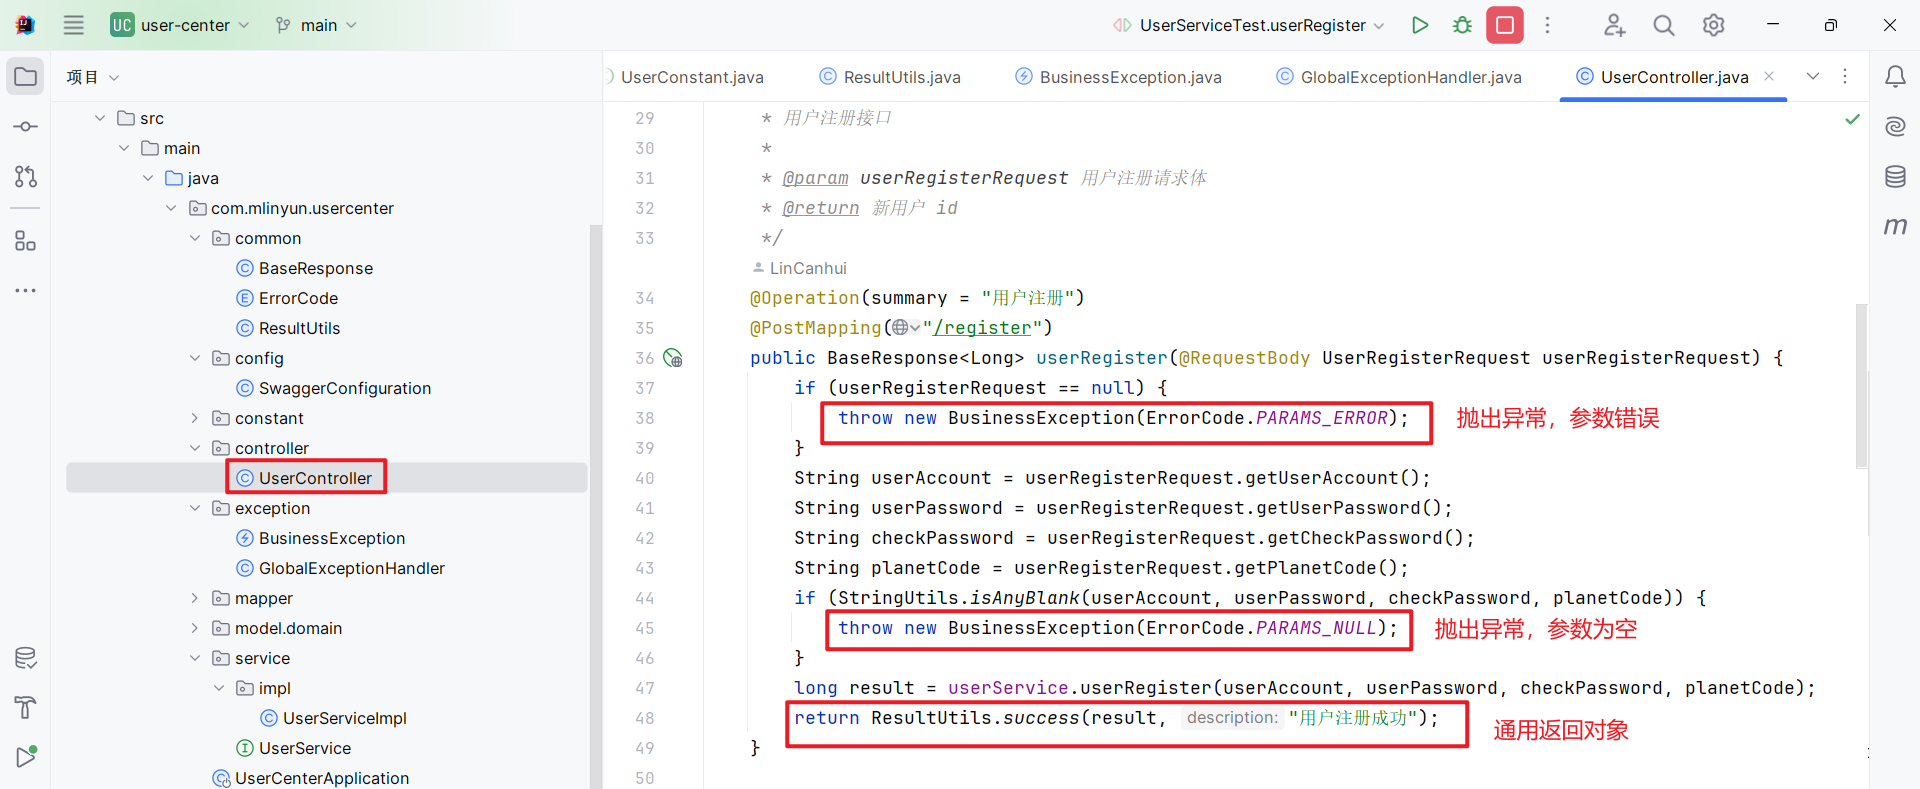
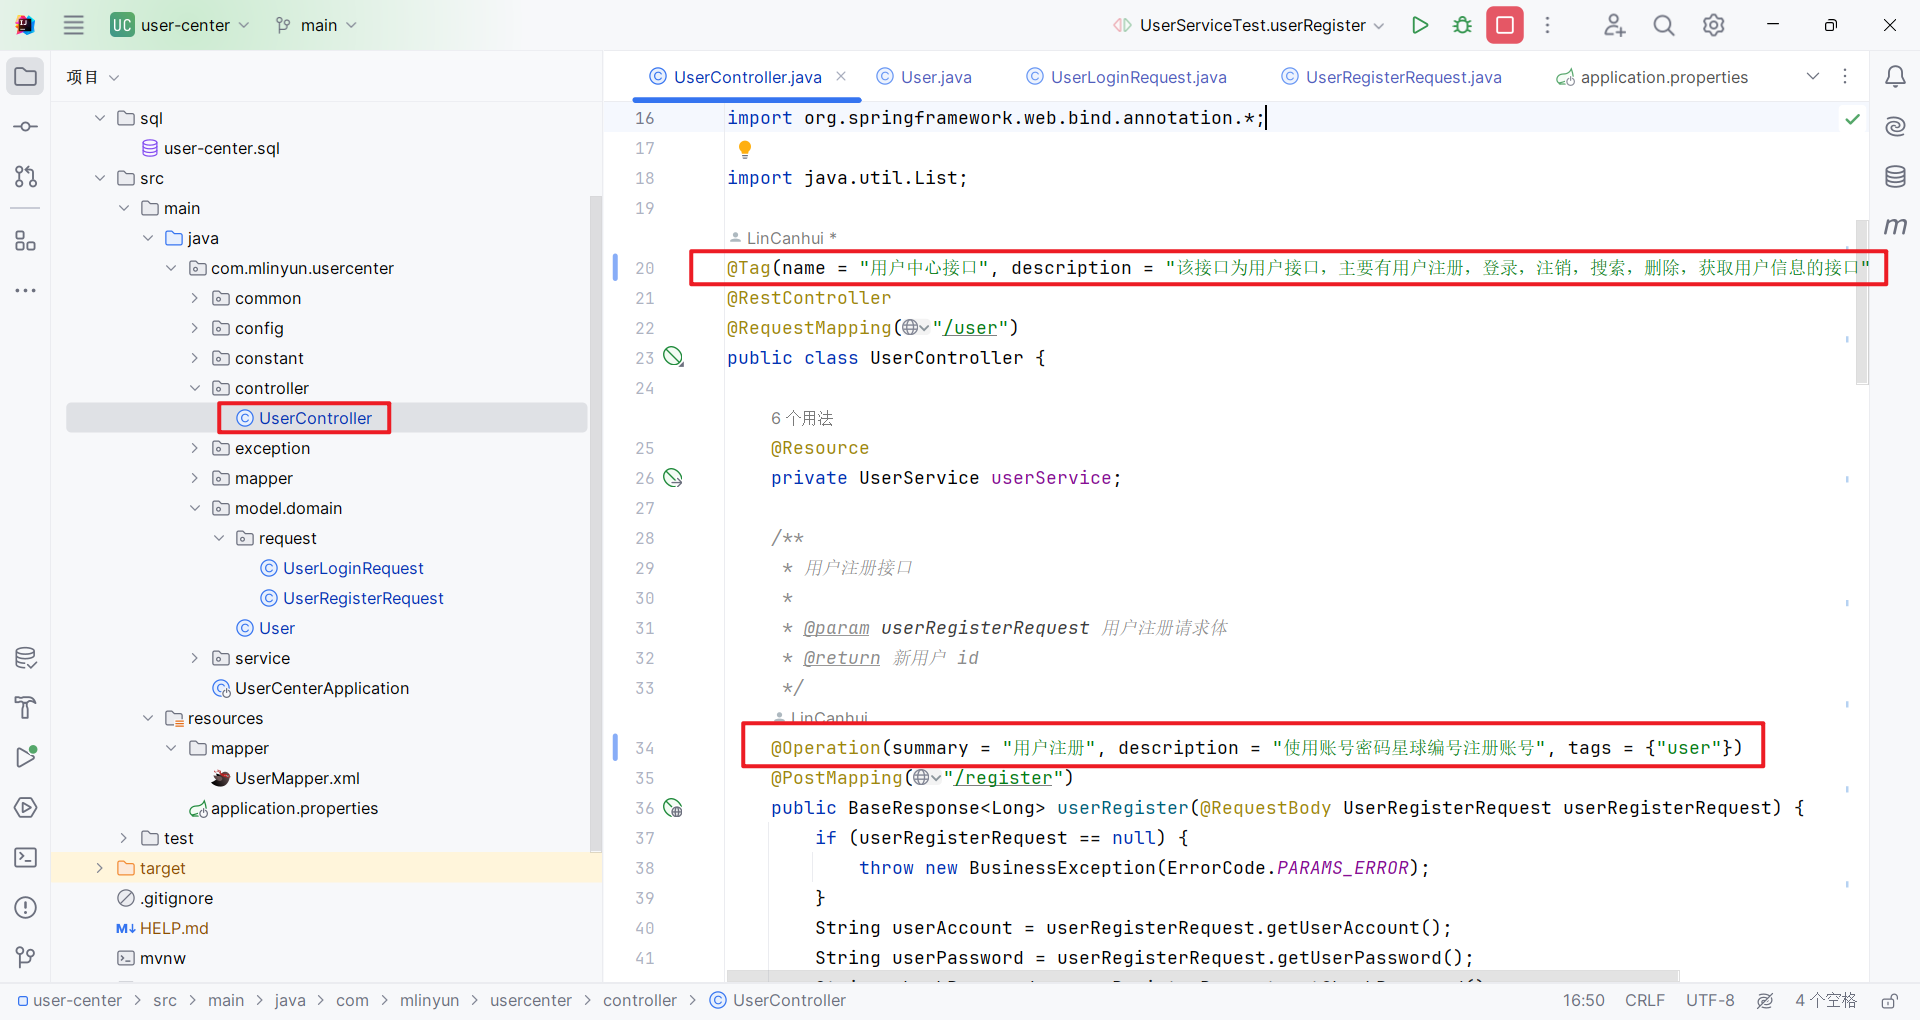
}添加 Controller 接口信息
打开 UserController.java 类,在类上添加 @Tag 标签用来描述一组操作的信息,在方法上面添加 @Operation 注解,用来描述接口信息:
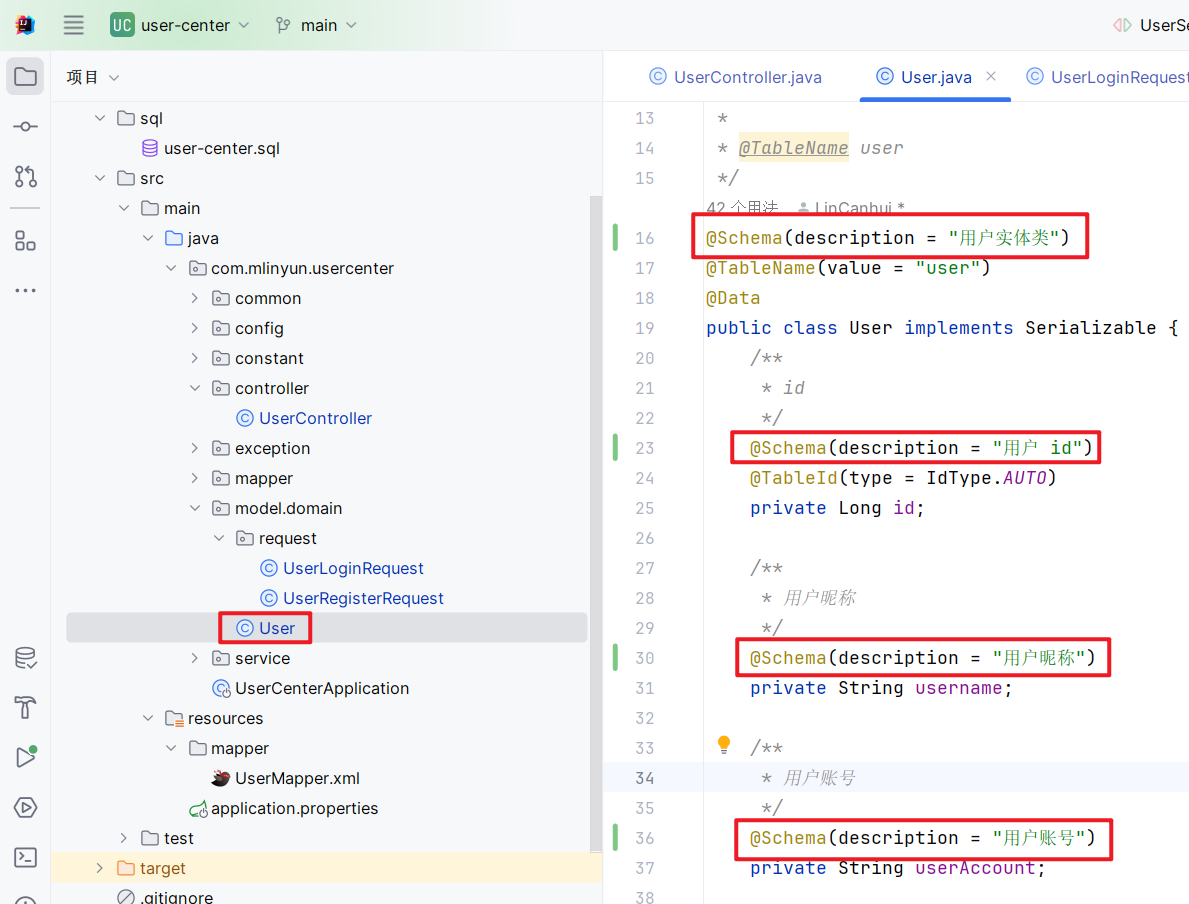
添加实体类信息
在此之前我们使用了三个实体类,分别是 User.java,UserLoginRequest.java 和 UserRegisterRequest.java,然后现在我们添加该实体类注解:
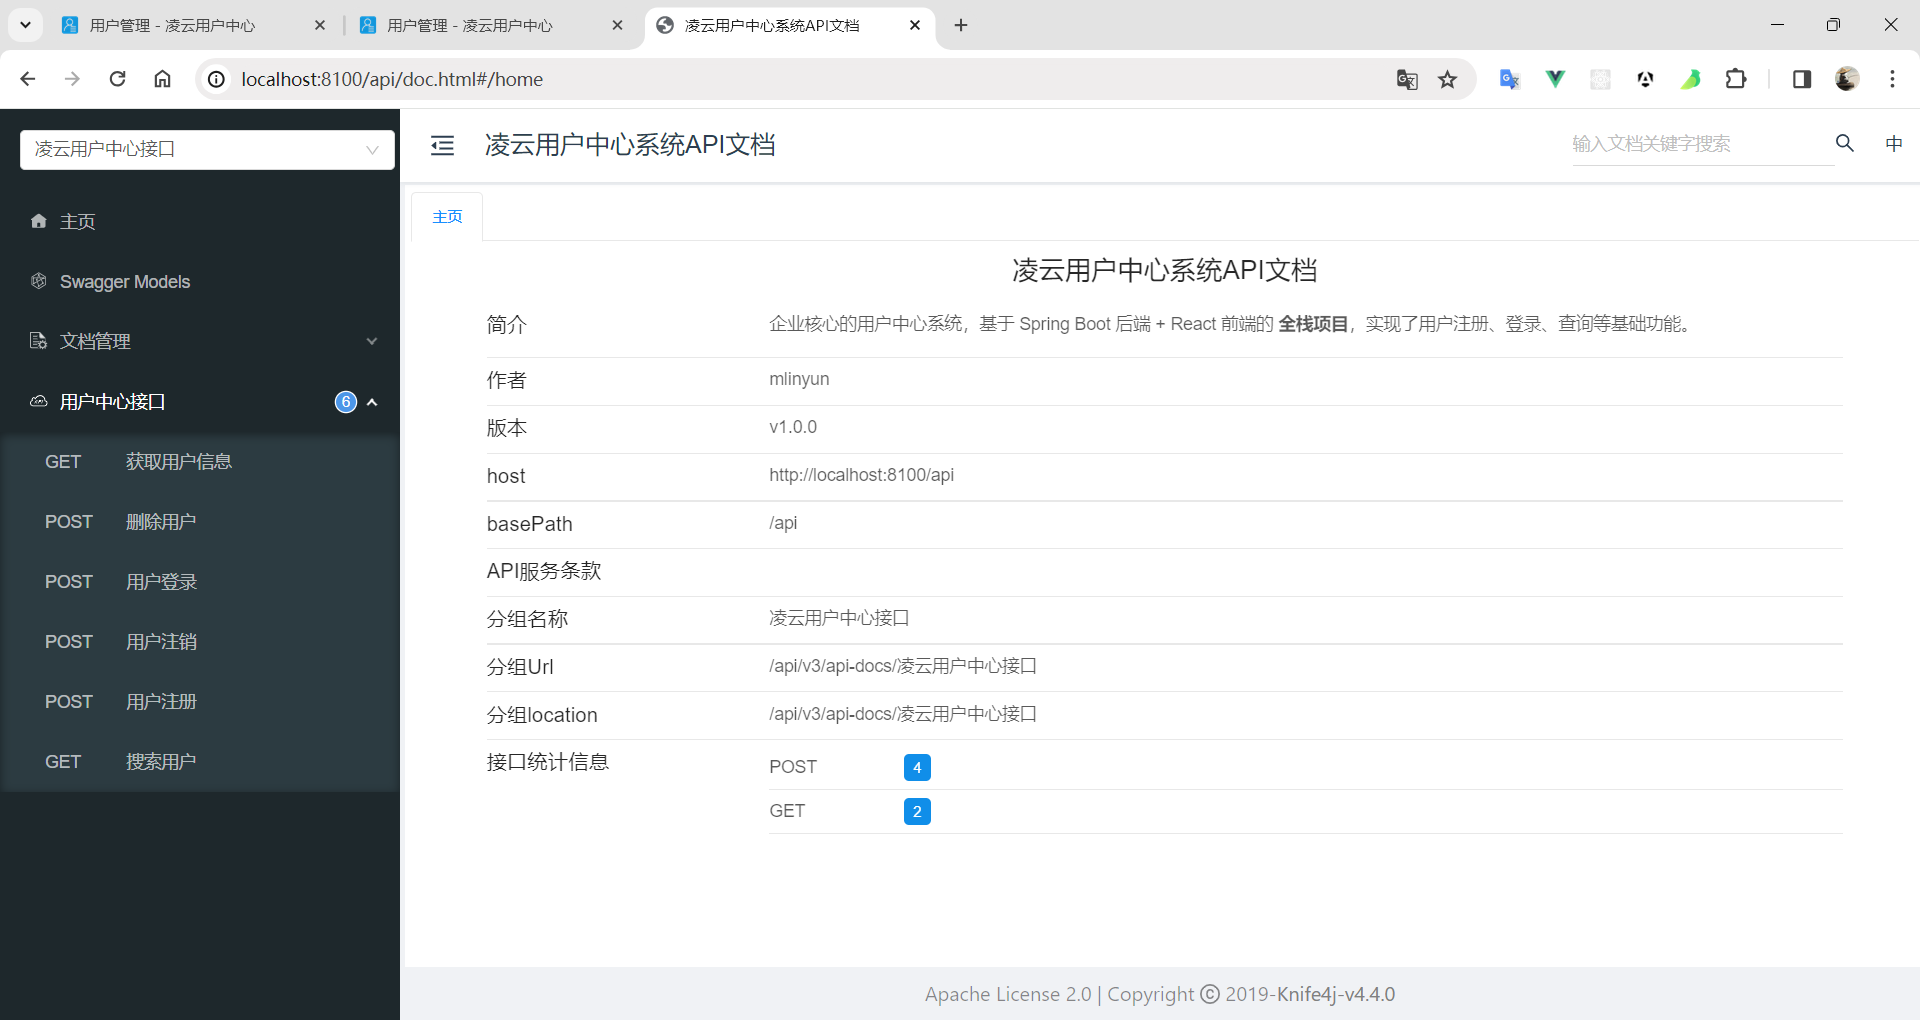
访问文档
启动项目,在地址栏之后添加 /doc.html 即可访问 knife4j 文档,如下图:
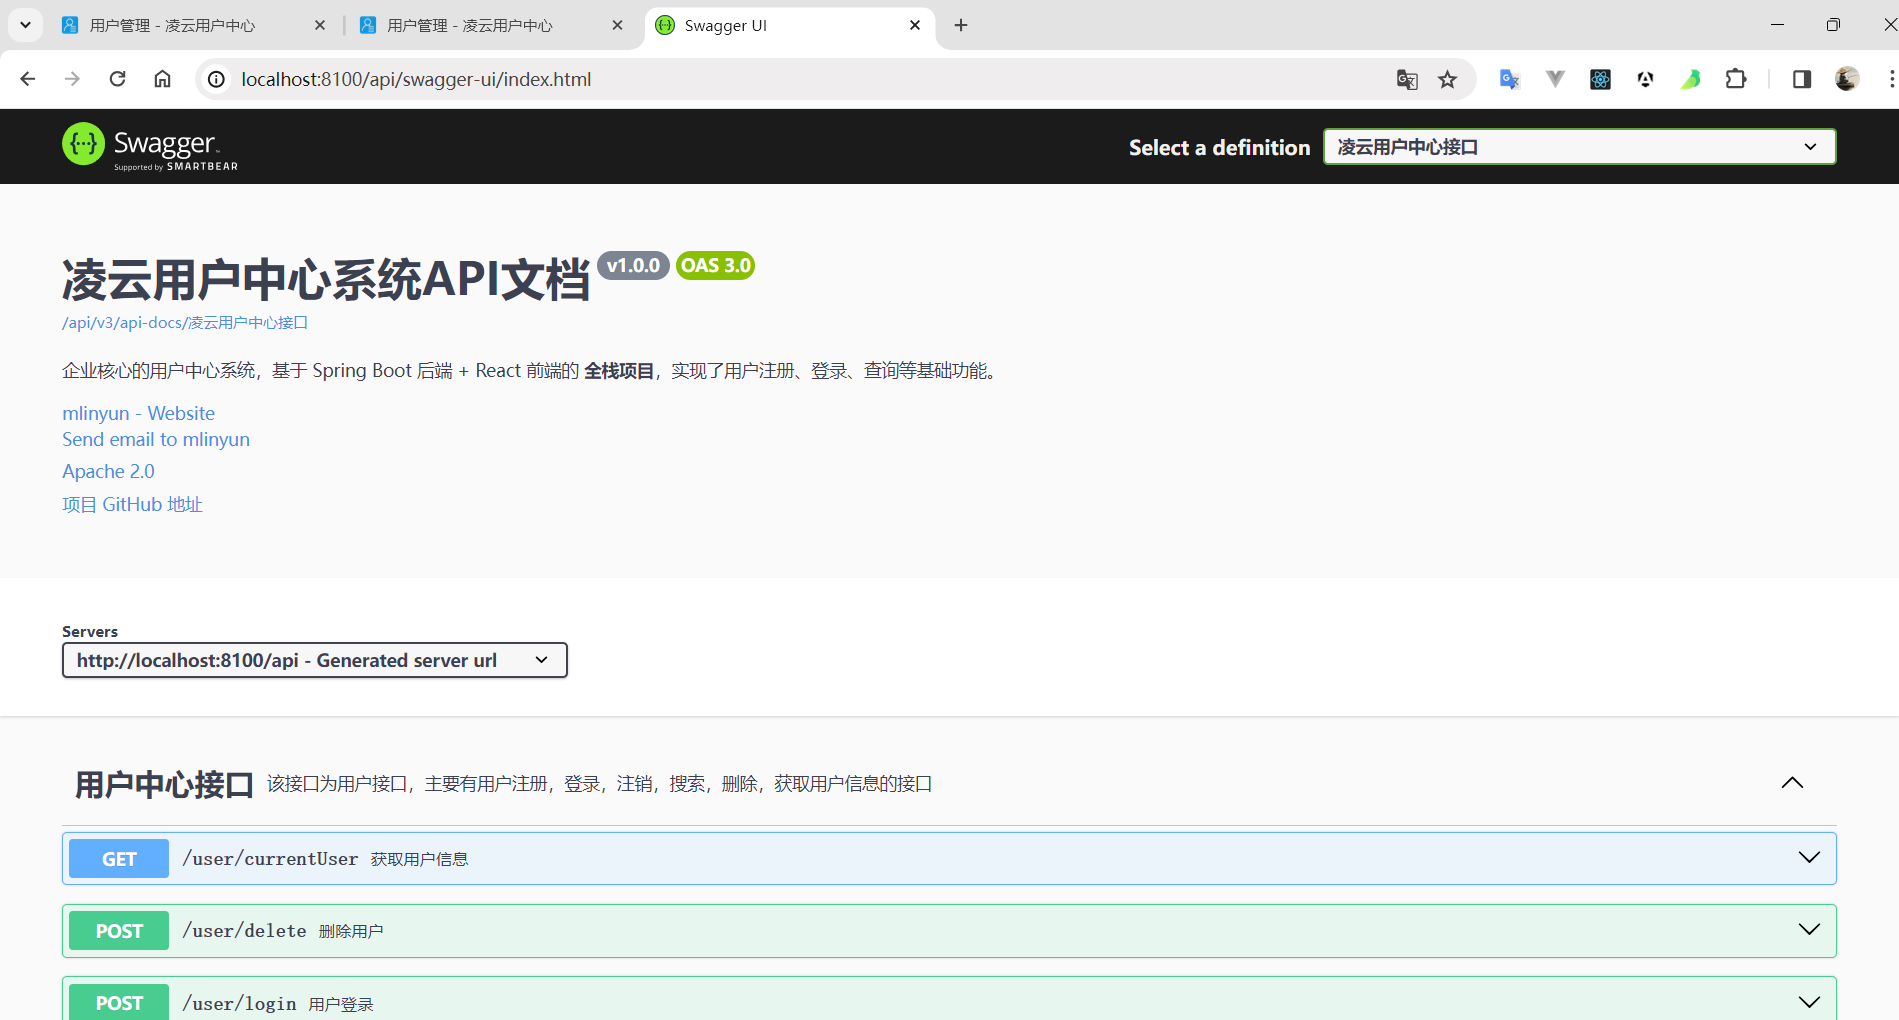
如果想访问 Swagger 文档,访问时请在后面追加 /swagger-ui/index.html,也可以追加 /user-center-api.html 访问(这个 URL 是我们上面配置的):
前端项目优化
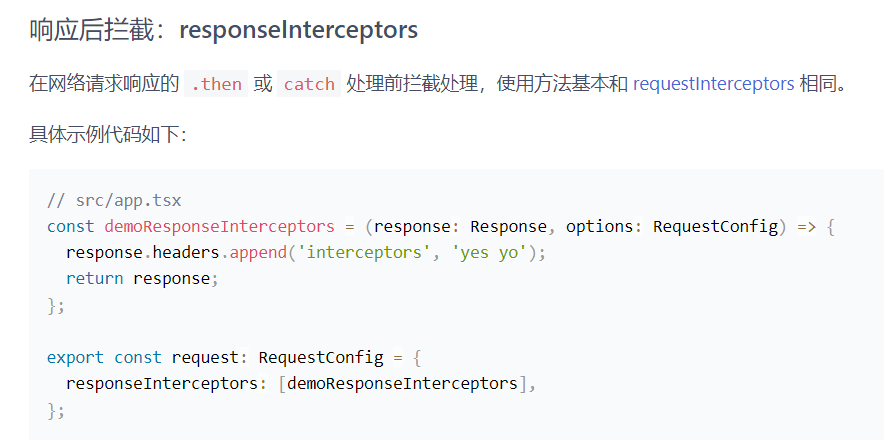
前端项目的优化就比较简单了,我们添加一个全局响应处理器来配合后端就行。这里鱼皮视频是另外新建一个全局请求类,我这里就不用这种方式了,因为我看了 Ant Design Pro 的官网有对应的教程:响应后拦截。
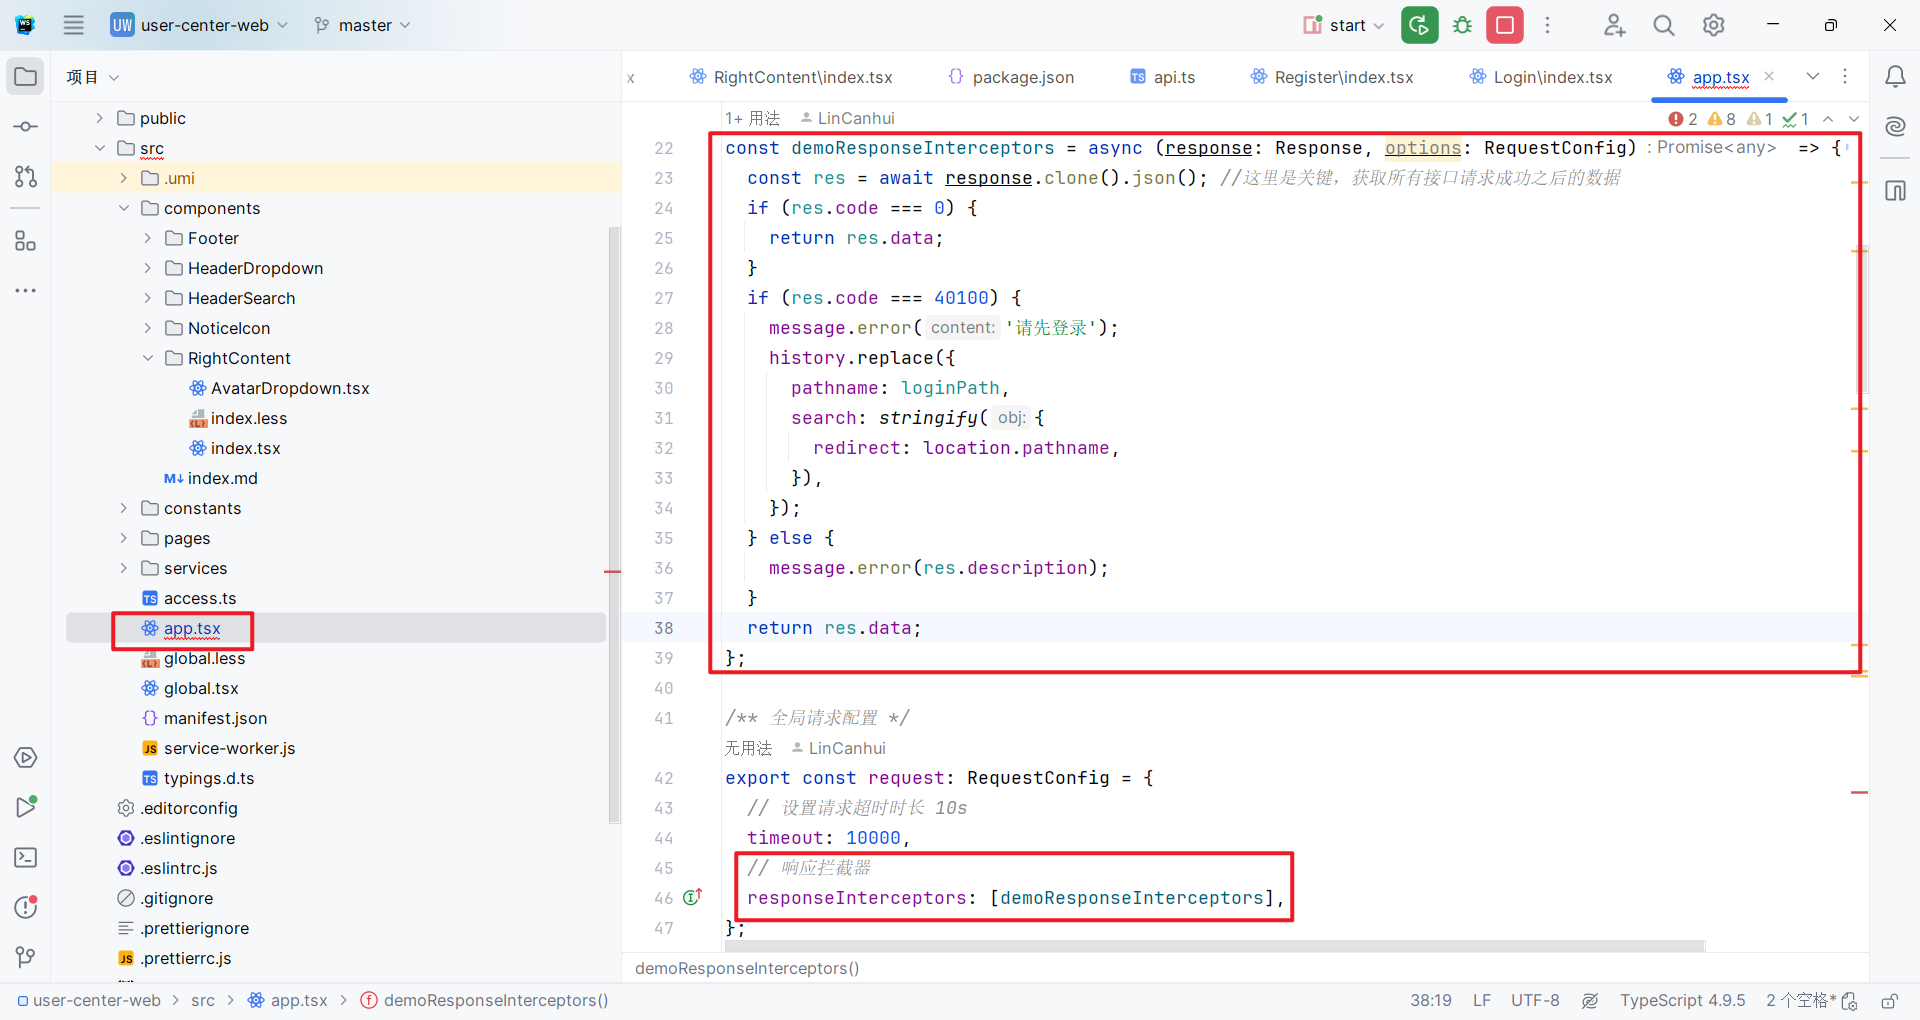
看来官网的教程之后,我们就可以来写属于我们自己的响应拦截器了,打开 src/app.tsx 文件,写入下面代码:
const demoResponseInterceptors = async (response: Response, options: RequestConfig) => {
  const res = await response.clone().json(); //这里是关键,获取所有接口请求成功之后的数据
  if (res.code === 0) {
    return res.data;
  }
  if (res.code === 40100) {
    message.error('请先登录');
    history.replace({
      pathname: loginPath,
      search: stringify({
        redirect: location.pathname,
      }),
    });
  } else {
    message.error(res.description);
  }
  return res.data;
};

/** 全局请求配置 */
export const request: RequestConfig = {
  // 设置请求超时时长 10s
  timeout: 10000,
  // 响应拦截器
  responseInterceptors: [demoResponseInterceptors],
};
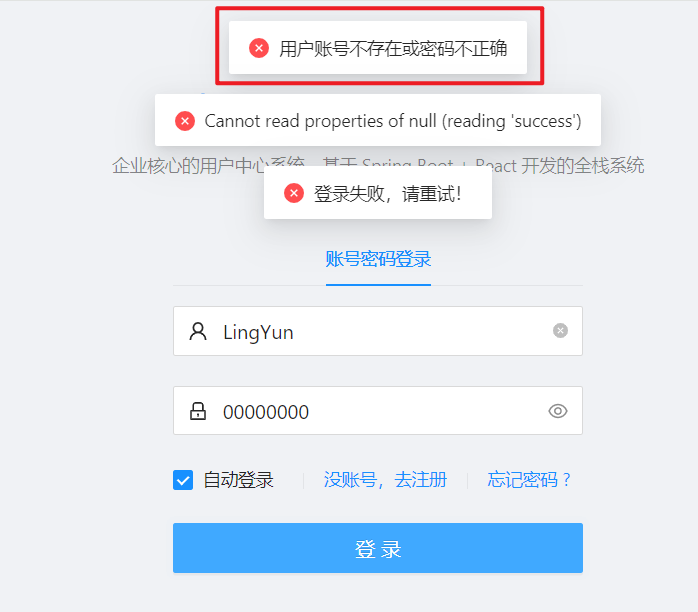
然后我们来测试一下,我们先用错误密码来尝试登录:
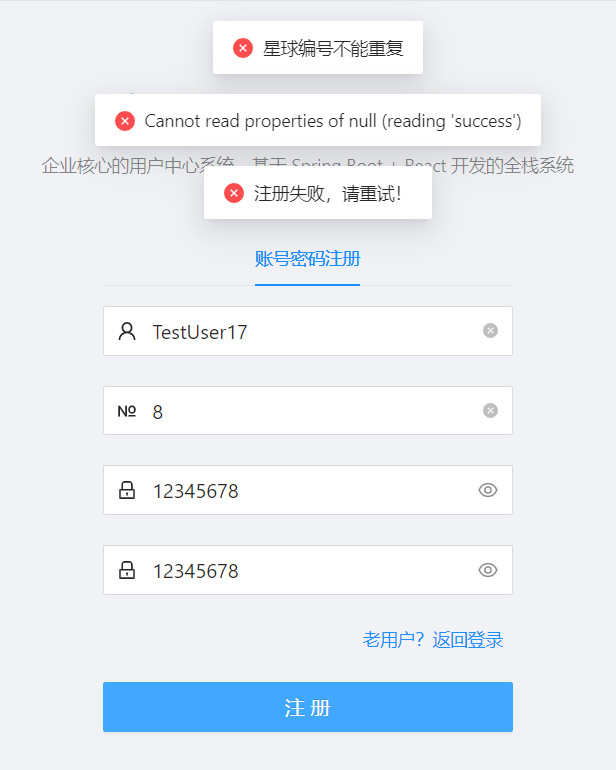
在来测试一下注册,我们注册一个已经存在的用户,或者已经注册过的星球编号: